 Photography has always been a trial and error process for me over the years. I may have taken a beginner’s photography course in college but there are some tricks that you just learn over time from making the same mistakes.
To improve my product photography, I decided to invest in a lighting kit about a year ago. Strobe versus continuous lighting? Tungsten versus fluorescent? Two or three lighting heads? I had so many questions and considerations before making my finally decision. Eventually, I decided to purchase a continuous tungsten lighting kit with two heads manufactured by Interfit.
Stupid me, I believed a lighting kit would make my job easier but I was wrong. No matter what settings I changed my DSLR too, I still had to go back and Photoshop the heck out my pictures. After quite some time, I realized that the lighting kit was not the issue, it was my white balance setting.
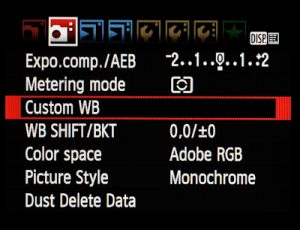
Super cool trick that makes your white balance accurate. First, you will need a piece of white cardstock paper. Turn on your lighting and snap a shot of your cardstock so it spans across the entire picture. For each DSLR camera model, it is slightly different but you need to find out how to setup a custom white balance. Once you figure out the settings for your camera, use that picture taken for your custom white balance.
After that, you can snap away without having to edit the white balance or color correct in Photoshop. It has saved me time and the headache of editing work that should have been right in the first shot!